So, this weekend I have been mucking about with my first batch of resin! It came on Friday, and Friday night found me in the kitchen, with newspaper spread out everywhere, latex gloves on, and all the windows open to counteract the fumes!
I put my first batch in the shed to dry, and at first I was concered, because it seemed to be taking an awfully long time… but it’s worked out, and my second batch is almost set, too! Here’s a snap..

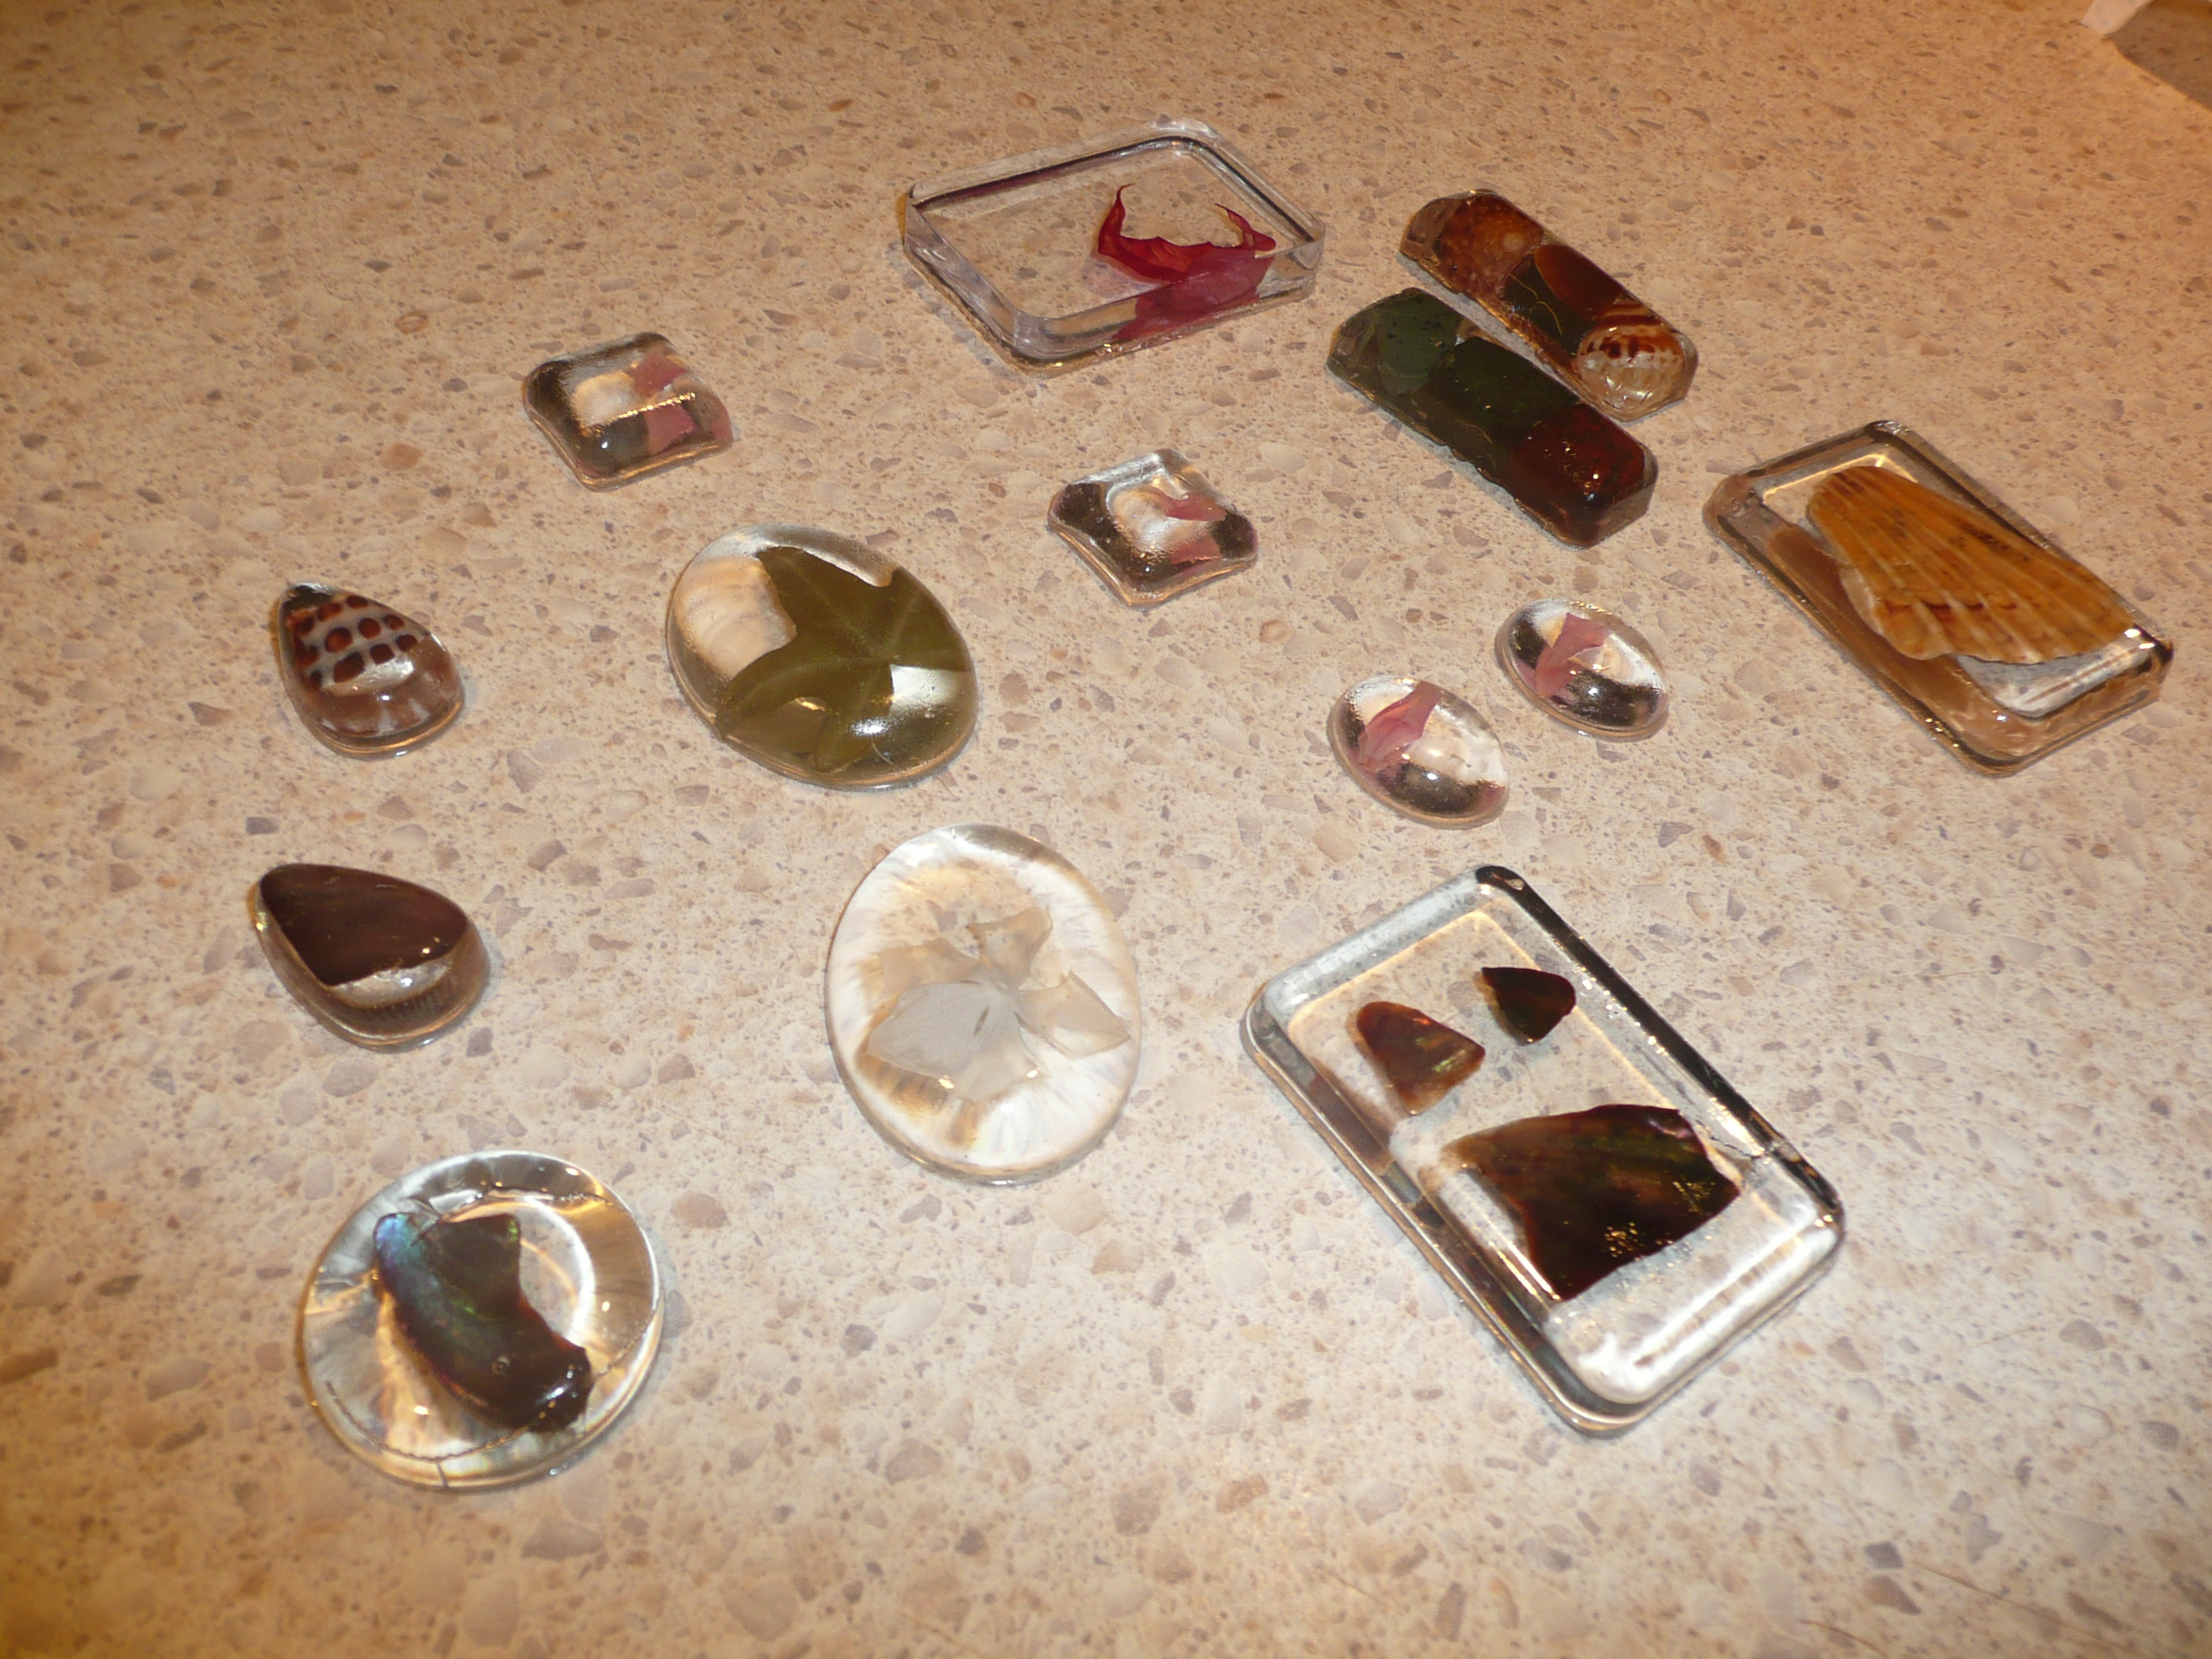
The first batch of resin!
I’m quite happy with how it all turned out. It taught me a few things, too – like that flowers and leaves are bled of colour during the curing process… but that can cause some interesting effects!
So, I’ll leave these for a few more days and then sand them, and then drill or attach bails to them 🙂
Oh now I actually read this I realise why they took so long to cure, the shed could be too cold for the catalyst to work at it’s full potential, it needs to be at at least 20 deg C, and I like to give it a bit longer in the airing cupboard to reduce the tackiness of the surface with a bit of extra heat for a few hours 🙂
I don’t think that was the problem… as days were at least 25 C by then.. though the nights may have done it. With my second batch I used more catalyst, and they hardened up much better. Thanks for the tip, though! I’ll have to remember that in winter 🙂
What kind of resin are you using. I would love to use this material for a project I am working on with window frames. 🙂
Hi Jess do you use the Easy Cast Clear Casting Epoxy from the place in Adelaide. I am just starting out doing some Bezel Set pendants and the first resin I used didn’t work. Thanks Wendy