Hello, hello, hello! I’m Thursday (a girl, not a weekday) and I’m quite excited to be here today to share a quick and cute DIY with you all.
I’m a cinch for a kitschy magnet – that’s why I’ve been making my own for years. Often time I run into vintage artwork that I adore and want to have in my sight constantly. So if the piece is small enough I’ll often turn that funny clipping into a moveable fixture on my fridge.
Want to see how I do it?

#1 – Gather your materials. You’ll need a magnet sheet, scissors, a craft knife and your artwork.

#2 – Cut out your artwork.
#3 – Decide on placement before you expose the adhesive side of the magnet.

#4 – Peel back the protective layer of the magnet. Place your artwork carefully – the adhesive is very sticky! Go slow because trying to reposition is impossible.
#5 – Using your craft knife carefully cut out your artwork. Fair warning – your hand will get stuck to the magnet about a billion times.

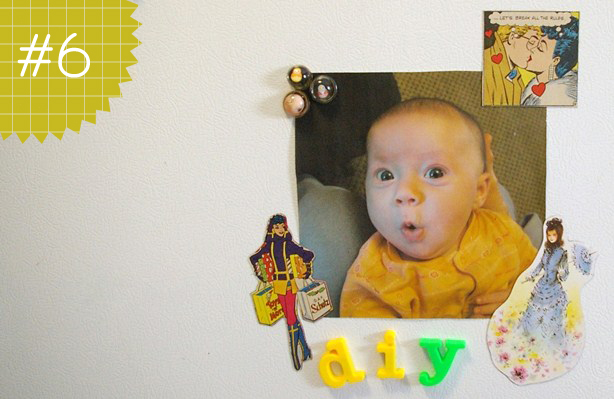
#6 – You’ve reached the finish line! Use your silly new magnets to decorate any metallic (er, um magnetic) surface.
This idea can be used for an endless number of projects – displaying family photos, Save the Date cards, a common to-do list, even as a project at a child’s birthday party!
Hope you had fun getting crafty with me today. If you ever want to hang out (maybe have a sleepover) then you should stop by the blog and say hello. I’d love new friends!

starburst medallion graphics provided by Pugly Pixel

Fab idea. I’m definitely doing this!
Aww, that Miss Thursday is a clever lady! And I love the little George cameo, what a cutie! I can never justify buying books and things because I never knew what I would do with them, I’ll be keeping an eye out now!
This is fun! I did something like this a while back with some paper dolls. I’d dress the doll on the fridge each day 🙂
Melanie – I love that idea!!
Love this!!!! Where would one purchase these said magnet sheets? I have altogether too many Archie comics at my house just waiting to be on my fridge!
I found the magnet sheets at the dollar store but you can also find them priced more expensively at craft stores 😉
Love this, and love Mel’s suggestion too!
hehe this is such a fun, unique and cool idea!! i love thursday!! 🙂
Such a fun idea! I don’t know where to but the magnet sheet in Indonesia tho. 🙁
Dita
⤠My Girl Thursday
⤠This DIY project
&
⤠this Epheriell Blog
What a great idea! The divine Miss Thursday is so very clever! 😀
Oh my gosh I had totally forgotten about Katy Keene! She was better than Barbie when I was little. Thanks for the memory 🙂